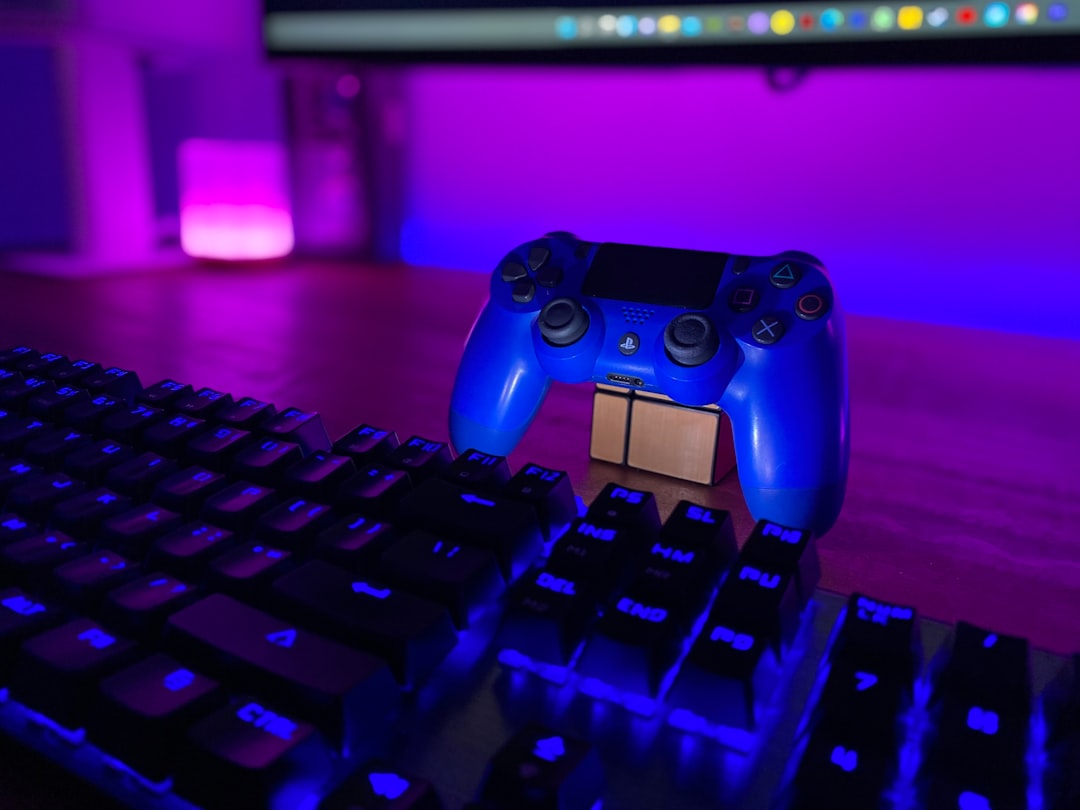
If you’re building a streaming setup from scratch, the biggest mistake is spending on flashy gear before fixing the fundamentals. A good stream is usually not held back by a $300 keyboard or RGB overload; it’s held back by bad audio, poor lighting, unstable framing, and a PC that is trying to encode video while also running a demanding game. The good news is that you can dramatically improve stream quality without going anywhere near “pro studio” money. This guide breaks down the accessories and low-cost tweaks that actually move the needle, with clear buying priorities, budget ranges, and practical recommendations for new streamers.
We’ll focus on the highest-impact upgrades first: audio, lighting, webcam choices, capture options, and PC optimization. Along the way, we’ll connect the dots between smart hardware decisions and the same kind of disciplined review process used in deep laptop reviews and prebuilt gaming PC deal checklists. The result is a budget-first roadmap that helps you start strong and upgrade only where the return on investment is obvious.
What Actually Improves a Stream First?
Viewers forgive modest visuals faster than bad sound
In most live content, audio is the first thing that makes someone stay or leave. Viewers can tolerate a slightly soft webcam image, but they rarely tolerate echo, keyboard clatter, or a mic that sounds like it’s trapped inside a cardboard box. That’s why the smartest budget allocation usually puts audio ahead of everything else. If your voice is clear and consistent, your stream immediately feels more professional, even if your camera is still entry level.
There’s a reason creators obsessed with production value often start by improving audio before they buy a more expensive camera. You can see the same principle in other hardware-focused buying guides like noise-cancelling headphone comparisons, where the right purchase depends on the use case, not the biggest spec sheet. For streamers, “best” means the accessory that improves audience comfort the most per dollar.
Lighting beats camera upgrades more often than people expect
If your room is dark, a budget webcam will always look worse than it should. On the other hand, even an inexpensive camera can look surprisingly clean with proper front lighting and a neutral background. Lighting is one of the few upgrades that improves not only how you look, but how the entire scene feels. It creates separation from the background, reduces noise in the image, and makes your face easier to read during intense gameplay moments.
This is why many beginner streamers should think of lighting as a core accessory rather than an optional add-on. If you want practical inspiration for setup hierarchy and composition, studies on visual audits for thumbnails and banners apply surprisingly well to streaming overlays too: clean composition, clear hierarchy, and one focal point usually outperform busy designs.
Budget is about return on attention, not just price tags
A $25 accessory can outperform a $250 one if it fixes the biggest bottleneck in your setup. That’s the mindset to bring to every streaming purchase. Instead of asking, “What’s the coolest thing I can add?” ask, “What will viewers notice immediately if this is better?” If the answer is audio, lighting, or frame stability, that’s your first upgrade.
That approach is similar to how smart shoppers evaluate everything from maintenance gadgets that save money on repairs to other value-driven purchases. You want the accessory that protects performance, reduces friction, and lasts long enough to justify the spend.
Audio Is the Highest-Impact Upgrade on a Budget
Why microphone quality changes your whole stream
Microphone quality affects clarity, trust, and fatigue. A clear voice helps your audience understand commentary, follow callouts in competitive games, and stay engaged during slower moments. It also gives your stream a more “finished” feel, which is especially important if you’re trying to grow from friends-and-family viewership into a broader audience. Bad mic audio can make a perfectly good stream feel amateur, while clean audio can make modest visuals feel intentional.
For streamers, the best mic is not always the most expensive condenser on the market. In untreated rooms, a good dynamic mic often wins because it rejects background noise better and is less likely to capture room echo. That matters if you live with roommates, stream near a window, or have a desktop PC with visible fan noise.
What to buy: USB dynamic or budget XLR?
For most beginners, a quality USB dynamic microphone is the best balance of convenience and performance. It avoids the extra cost of an audio interface, works immediately, and usually has enough off-axis rejection to handle imperfect rooms. If your budget is tight, prioritize a mic that sounds consistent at close range rather than one that advertises “broadcast warmth” but picks up every reflection in the room. If you later decide to expand, an XLR setup can be the next step, but it is not the best starting point for most new creators.
Think of mic shopping the same way you would approach lab-metric-driven laptop reviews: ignore buzzwords and compare the things that matter in real use. For audio, that means polar pattern behavior, plosive handling, mounting options, and how much gain the mic needs before your room noise becomes obvious.
Microphone tips that improve quality without buying more gear
The cheapest way to improve your mic is usually placement. Keep the mic close to your mouth, slightly off-axis, and away from keyboard noise. Use a pop filter or foam windscreen if plosives are a problem, and lower your input gain as much as possible while still getting a healthy signal. Most beginners run the mic too quietly and crank gain too high, which is the fastest way to pull room noise into the mix.
Pro Tip: If your mic sounds thin, don’t immediately blame the microphone. Try moving it two to four inches closer and lowering gain. In many rooms, that single adjustment does more than an expensive upgrade.
Lighting for Streamers: The Cheapest Visual Upgrade with the Biggest Payoff
Start with one soft front light, not a studio kit
People often overbuy lighting because the gear looks cool. In reality, a single soft light placed slightly above eye level and in front of you can improve your stream dramatically. A small ring light can work for very tight desk setups, but a soft LED panel or softbox-style light often creates a more flattering, natural result. The goal is not to look like a movie set; it’s to make your face readable and your colors consistent.
Good lighting also makes your webcam and capture results look more expensive. That’s because the camera doesn’t have to amplify a dim image as much, which reduces grain and preserves color. If you want a broader perspective on making content look polished, the ideas in visual hierarchy and profile optimization are a useful analog: strong first impressions are built, not guessed.
Practical lighting setups for small rooms
If you have limited space, position a single soft light to one side of your monitor and slightly above your eye line. If the image looks too harsh, bounce it off a white wall or place a diffuser in front of it. A second lower-powered fill light can help, but only after the first light is dialed in. For green-screen users, even lighting matters more than raw brightness because uneven exposure creates cleanup problems later in the stream workflow.
Window light can be great during the day, but it is inconsistent and can change rapidly as the sun moves. That’s why even a modest artificial light source is more reliable for creators who stream on a schedule. Reliability is the hidden value here: the same camera setup should look good on a Monday afternoon and a Saturday night.
Don’t forget the background
A tidy background often matters more than expensive decorative accessories. You do not need a collector’s wall of merch; you need one or two intentional visual anchors, enough contrast to separate you from the wall, and a scene that does not distract from gameplay or commentary. If you use RGB, keep it coordinated rather than chaotic. Viewers tend to read cohesive visuals as “professional” and clutter as “unfinished.”
That same principle shows up in other consumer categories too, such as functional furniture buying or setup curation, where one strong choice can improve the whole room more than several flashy ones.
Webcams: When to Buy and What Matters Most
Do you even need a webcam on day one?
If you are primarily building an audio-first or gameplay-focused channel, you do not have to start with a premium camera. But for most variety streamers, a webcam helps with audience connection, reaction content, and stream identity. People respond to faces, especially during live chats, hot takes, and high-stakes gameplay moments. A face cam can make a small channel feel more personal and more approachable.
The best time to buy a webcam is when lighting and audio are already reasonably stable. Otherwise, you’ll blame the camera for issues caused by the room. Much like checking a prebuilt PC deal, you want to verify the whole chain before deciding which component deserves the budget.
Webcam recommendations by budget tier
At the entry level, look for a webcam that handles 1080p well in real-world lighting, not just in ideal product photos. Autofocus should be stable, and low-light performance should be acceptable. In the midrange, a stronger sensor, better exposure control, and sharper detail become worthwhile if you stream often. For the best value, many streamers still get better results from a modest webcam paired with strong lighting than from a more expensive camera in a dark room.
Budget camera advice is a lot like reading deep device reviews: the spec sheet matters less than the conditions you actually use it in. For webcams, that means motion handling, autofocus stability, and how the image looks when your face is lit by a real desk lamp rather than a showroom.
Settings that make any webcam look better
Use manual exposure if your software allows it, and avoid letting the camera chase brightness during gameplay. Set white balance consistently so your skin tone doesn’t shift from warm to blue every few seconds. If your webcam supports it, reduce digital sharpening that creates halos around your face and background. Small changes here often make the image feel cleaner than buying another camera tier.
One overlooked trick is to turn off unnecessary auto-enhancement features in both the webcam software and streaming app. Overprocessed face smoothing, aggressive contrast, and unstable exposure can make the image look cheap even when the camera itself is good. Stability is part of quality.
Capture Cards and Console Streaming: Spend Only When You Need To
When a budget capture card is worth it
If you stream from a console, a budget capture card can be a smart purchase, especially if you want to add overlays, webcam compositing, or multi-source scenes from a PC. The main thing to understand is that not every creator needs one. If your platform and device already support direct streaming, a capture card only makes sense when it gives you better production control or more reliable routing. Otherwise, it’s another point of failure and another expense.
Before buying, consider how often you’ll use it and what it solves. If the card lets you capture from a console, switch scenes, and record locally, it may be worth the cost. If you only plan to stream once or twice a month, that budget might be better spent on lighting or a microphone.
What to look for in a low-cost capture card
Prioritize real pass-through stability, compatible resolution and refresh rates, and low-latency behavior. Cheap cards often look good on paper but fail under sustained use or introduce audio sync issues. For streamers focused on fast games, latency matters more than fancy packaging or included cables. Also make sure the card is compatible with your console, operating system, and streaming software before buying.
That “check the compatibility first” mindset mirrors the logic used in deal vetting guides and even broader hardware evaluations like lab-based reviews. The best-value product is the one that behaves correctly in your exact workflow.
When to skip the capture card entirely
If you’re streaming PC games only, a capture card is usually unnecessary. OBS, Streamlabs, or similar tools can capture gameplay directly with less cost and complexity. The budget is often better spent on frame pacing, storage cleanup, and a stable network connection. For a lot of new streamers, a capture card becomes a future upgrade rather than a launch requirement.
That money can also be redirected into practical maintenance tools. A small example: cleaning a dusty desk PC with the right accessory, like a cordless electric air duster, can improve thermals and reduce fan noise while saving you from endlessly repurchasing canned air.
PC Tweaks That Improve Stream Quality Without New Hardware
Reduce background load before chasing new parts
Many new streamers buy hardware because their PC feels slow, but the real issue is often software clutter. Close launchers, cloud sync apps, browser tabs, and unnecessary overlays before you go live. A lighter system load gives your encoder more breathing room and improves consistency during busy moments. This matters especially in games that already push the GPU or CPU hard.
There’s a lot of value in approaching your PC like a performance system rather than a shopping list. The same disciplined thinking used in PC deal checklists can help you eliminate bottlenecks before spending a dollar. Sometimes the fix is as simple as moving your stream output from the same drive as a game installation to a cleaner storage path.
Encoder settings, bitrate, and resolution
For budget systems, one of the biggest wins comes from choosing realistic output settings. If your upload bandwidth is limited, pushing too high a bitrate can create instability and buffering. If your PC is older, streaming at a slightly lower resolution can preserve gameplay smoothness and keep the stream more watchable. The goal is not to maximize numbers in your software; it is to find a stable setting that works every time.
Bitrate choices should match the platform, your internet connection, and the content you stream. Fast action games need clean motion, but talk-heavy or strategy streams can often look excellent at more modest settings. This is where practical testing beats theory: run a few private test streams, inspect playback, and keep notes.
Simple maintenance that protects performance
Dust management, thermal health, and driver hygiene are underrated parts of stream quality. A dusty case can raise fan speeds, create noise in your mic, and throttle performance under load. If you want a no-nonsense maintenance upgrade that pays for itself, the case for a cordless electric air duster is strong for streamers who care about both performance and noise. Better airflow often improves not just temperatures, but the overall feel of a setup.
Pro Tip: Before spending on a new GPU or capture hardware, test your current setup with a fresh driver install, cleaned airflow path, and a lighter OBS scene collection. Many “hardware problems” disappear once the system is maintained properly.
Best Budget Streaming Accessories by Priority
A simple comparison of what to buy first
Not every streamer needs the same exact order of upgrades, but the hierarchy below works for most beginners. Audio and lighting are the foundational improvements because they affect every second of the stream. Webcam, capture, and PC tweaks come next because they refine production value and stability. Decorative gear and advanced peripherals should come last unless they also solve a practical issue.
| Accessory | Typical Budget Range | Impact on Stream Quality | Best For | Priority |
|---|---|---|---|---|
| USB dynamic microphone | $40–$120 | Very high | Voice clarity in untreated rooms | 1 |
| Soft front light or LED panel | $20–$80 | Very high | Making webcams look cleaner and brighter | 2 |
| Budget webcam | $30–$100 | High | Face cam and reaction content | 3 |
| Budget capture card | $50–$120 | Medium to high | Console streaming and multi-source setups | 4 |
| Cable management and PC cleaning tools | $10–$40 | Medium | Noise reduction and reliability | 5 |
That table is intentionally simple because beginners need a clear order of operations, not a wall of options. If you are unsure where to start, buy the first item that fixes the most obvious flaw in your stream. For most people, that is the microphone. For others, it is lighting, especially if the webcam already performs reasonably well.
Where value-focused shoppers often overbuy
Common overspends include fancy arm mounts that don’t actually isolate vibration, oversized RGB kits that make the room look busier, and “premium” webcams bought before the lighting problem is solved. Another mistake is spending on console capture before confirming whether the stream will even be console-focused long term. These purchases are not always bad, but they are often mistimed.
Think about it the same way you would evaluate a prebuilt gaming PC deal: you don’t pay extra for features that don’t change your actual use case. Budget streaming rewards discipline.
How to Build a Budget Stream Setup in Real Life
The under-$100 starter path
If you’re extremely constrained, start with a decent USB microphone and use your phone as a temporary camera if necessary. Add one cheap soft light before you buy a webcam, because it improves everything else you test later. Clean your PC, close background apps, and simplify your scene layout so the stream runs smoothly. This path will not look elite, but it can absolutely look respectable and intentional.
It’s also the most forgiving starting point because each upgrade compounds. A clearer voice makes viewers more willing to stick around, and better light makes your next webcam purchase more effective. The goal is momentum, not perfection.
The balanced $150–$300 path
For most aspiring streamers, this is the sweet spot. Pair a good USB mic with a reliable light and a solid webcam, then use software settings to refine the presentation. If you stream console games, this is also the point where a budget capture card starts to make sense if it meaningfully improves your workflow. You are now buying a system, not just accessories.
That’s also when it becomes useful to think like a content operator. Guides on surfacing overlooked games through smarter signals are a good reminder that quality processes matter as much as individual tools. A stream setup works the same way: each piece should make the whole channel easier to discover and enjoy.
The “buy once, upgrade later” mindset
Spend to remove friction, not to satisfy upgrade anxiety. A sturdy mic, a single light, and a webcam that behaves predictably are better than three accessories that look good in a thumbnail but create daily annoyance. Save the deep aesthetic investments for later, once you know the channel format that actually suits your style. If you end up streaming more than expected, you can always scale.
This measured approach is the most sustainable for people who want to stream consistently without overspending. It also makes each future upgrade feel earned, which is a much better long-term motivation than chasing the newest gadget.
Final Verdict: The Accessories That Actually Matter
If you want the shortest possible answer, here it is: prioritize mic quality, then lighting, then webcam, then any capture or PC tweaks that solve a real bottleneck. That order gives you the biggest visible and audible improvement per dollar. It also helps you avoid the trap of buying gear that looks exciting but does little for viewers. Great streams are usually built on a handful of smart, boring decisions executed well.
When in doubt, spend where viewers will notice the improvement immediately. Audio makes your commentary easier to trust, lighting makes your face and scene readable, webcam choices determine how polished your presentation feels, and PC maintenance keeps the whole machine reliable. For more hardware value thinking, it helps to read technical reviews with an eye for real-world impact, not just spec-sheet bragging rights.
As your channel grows, you can layer in more advanced upgrades, but the core formula stays the same: clean sound, clear image, stable performance. That’s the foundation of stream quality on a budget, and it’s enough to make a small setup feel much more serious than the price tag suggests.
Related Reading
- How to Vet a Prebuilt Gaming PC Deal: Checklist for Buyers - Learn how to spot value and avoid hidden compromises before you spend.
- How to Read Deep Laptop Reviews: A Guide to Lab Metrics That Actually Matter - A useful framework for cutting through marketing hype on hardware.
- Ditch the Canned Air: Save Money and the Planet with a Cordless Electric Air Duster - A practical maintenance upgrade that helps keep PCs cleaner.
- Visual Audit for Conversions: Optimize Profile Photos, Thumbnails & Banner Hierarchy - Great advice for making your on-screen visuals read faster.
- Automating Hidden Gem Discovery: Data Signals Storefronts Should Use to Surface Underrated Games - An insightful look at how smart signals improve discovery and performance.
FAQ: Budget Streaming Setup Questions
What should I buy first for a budget streaming setup?
Start with a microphone if your audio is weak, or lighting if your webcam image is dark and noisy. These two upgrades usually improve perceived production value more than anything else. If both are acceptable, focus on the one that causes the most viewer complaints or friction during your tests.
Is a cheap webcam good enough for streaming?
Yes, if you have good lighting and realistic expectations. A budget webcam can look surprisingly clean in a well-lit room, but it will struggle in poor light. For most beginners, lighting is the smarter first purchase because it lifts camera performance across the board.
Do I really need a capture card?
Only if you stream from a console or need a specific multi-device workflow. PC-only streamers usually do not need one at the start. If your setup already supports direct capture and streaming cleanly, a capture card can wait.
How do I improve microphone quality without buying a new mic?
Move the mic closer, reduce gain, and place it away from keyboard noise. Use a pop filter if plosives are harsh, and make sure your room isn’t overly reflective. These adjustments often create a bigger improvement than many cheap hardware swaps.
What PC tweaks help stream quality the most?
Close background apps, clean dust from the case, confirm stable encoder settings, and test realistic output resolution and bitrate. Many performance issues come from clutter, heat, or poor software settings rather than failing hardware. A clean system is often a better “upgrade” than a new component.